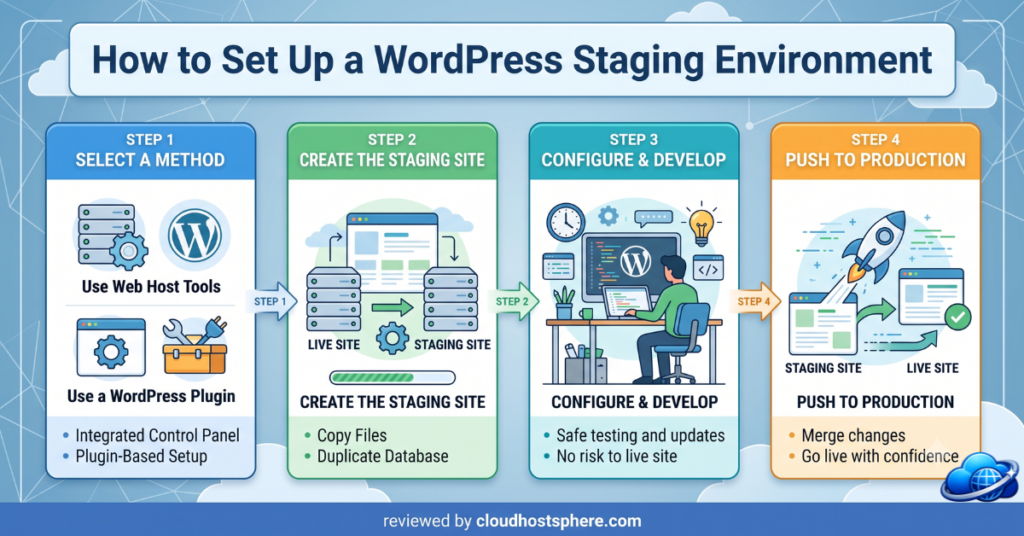
A staging environment is a private copy of your WordPress site where you can test updates, new plugins, theme changes, and custom code before anything touches your live site. We’ve seen too many site owners skip staging, run an update directly on production, and spend hours recovering from a broken layout or a plugin conflict. A staging environment costs nothing on most managed hosts and takes under five minutes to set up. Here’s how to do it.
What Is a WordPress Staging Environment?
A staging environment is a clone of your live website hosted at a private URL — typically something like staging.yourdomain.com or a subdomain only you can access. It’s an exact replica of your production site: same WordPress version, same plugins, same theme, same database content. Changes made on staging don’t affect your live site until you deliberately push them.
Think of it as a sandbox. You can break things, experiment, and test freely — then either push the working changes to live or discard them entirely with no harm done.
Why You Need One
- ✅ Safe plugin updates — test a major plugin update on staging first; if it breaks something, your live site is unaffected
- ✅ Theme and design changes — preview redesigns without visitors seeing a half-finished layout
- ✅ Custom code and development — developers can build and test without touching production
- ✅ WooCommerce changes — test new payment gateways, shipping rules, or checkout flow changes before they affect real orders
- ✅ Client review — agencies can show clients a new design or feature before going live
Method 1 — One-Click Staging via Your Managed Host (Easiest)
Most managed WordPress hosts include staging environments as a built-in feature. This is by far the easiest method — no plugins, no manual setup, no FTP.
Cloudways
Cloudways includes staging on all plans. In your Cloudways dashboard: select your application → Staging Management → Create Staging. Cloudways creates a full clone of your app at a staging URL in a few minutes. When you’re ready to push changes live, use the “Push to Live” button — you can choose to push files only, database only, or both.
Try Cloudways With Built-In Staging →
Pressable
Pressable includes one-click staging on all plans via the MyPressable dashboard. Navigate to your site → Staging → Create. Staging and production environments are kept in sync through a simple push/pull workflow. Pressable’s staging implementation is particularly clean for agency workflows where multiple team members need access.
HostArmada
HostArmada provides a staging tool via cPanel’s Softaculous installer. Navigate to Softaculous → WordPress → select your installation → Create Staging. The staging site is created at a subdomain and can be pushed back to live through the same interface.
Method 2 — Using a WordPress Plugin
If your host doesn’t include a built-in staging tool, a plugin is the next best option. Two reliable choices:
WP Stagecoach
WP Stagecoach creates a staging site at a subdomain and offers a “merge” function to push changes back to live. It handles the database and file sync automatically. Paid plans start around $8/month.
Duplicator
Duplicator (free and Pro) is primarily a migration and backup plugin, but it works well for creating a staging copy manually. You create a package of your live site, then install it at a staging subdomain. The process takes about 15 minutes but is reliable on virtually any host. The free version handles this adequately for most sites.
Method 3 — Manual Staging Setup (Any Host)
If you’re on shared hosting with no staging tool and prefer not to use a plugin, here’s the manual approach:
- Step 1: Create a subdomain in cPanel — e.g.,
staging.yourdomain.com— and note the directory it points to - Step 2: Copy all your live WordPress files to the staging directory via FTP or cPanel File Manager
- Step 3: Export your live database via phpMyAdmin (Export → Quick → SQL)
- Step 4: Create a new database for staging in cPanel → MySQL Databases
- Step 5: Import the exported SQL file into the new staging database via phpMyAdmin
- Step 6: Edit
wp-config.phpin the staging directory to point to the new staging database (update DB_NAME, DB_USER, DB_PASSWORD) - Step 7: Run a search-and-replace on the staging database to update all URLs from your live domain to your staging subdomain — use the WP-CLI command:
wp search-replace 'https://yourdomain.com' 'https://staging.yourdomain.com' --all-tables
⚠️ Note: After setting up manual staging, add define('DISALLOW_INDEXING', true); to your staging wp-config.php and confirm the site is set to discourage search engines in Settings → Reading. You don’t want Google indexing your staging site.
How to Push Staging Changes to Live
How you push depends on your staging method:
Host-provided staging (Cloudways, Pressable, etc.)
Use the dashboard’s “Push to Live” button. Most platforms let you choose what to push: files only (for theme/plugin changes), database only (for content changes), or both. Always take a backup of your live site before pushing — in case something needs to be rolled back.
Plugin-based staging
Use the plugin’s merge or push function. WP Stagecoach provides a selective merge — you can choose which changed files and database tables to push. Review the change list before merging to avoid overwriting live content changes made after the staging copy was created.
Manual staging
Manual pushes require reversing the process: copy changed files back to live via FTP, export the staging database, search-and-replace URLs back to the live domain, and import into the live database. This is time-consuming and error-prone — which is why a host with built-in staging is strongly preferable.
Staging Best Practices
- ✅ Always back up live before pushing — even a simple cPanel backup takes 2 minutes and protects against push errors
- ✅ Keep staging in sync — refresh your staging copy from live regularly, especially before major testing sessions. Staging a two-month-old copy of your site isn’t useful.
- ✅ Block search engines from staging — Settings → Reading → “Discourage search engines from indexing this site” on your staging environment
- ✅ Password-protect staging — add HTTP authentication to your staging URL so only you and your team can access it. Most managed hosts offer this in one click.
- ✅ Test the push on a small change first — before pushing a major redesign, test a small CSS change end-to-end to confirm your push workflow is working correctly
Frequently Asked Questions
Does staging affect my live site?
No — staging is completely isolated from your live site. Changes made on staging don’t appear on live until you explicitly push them. The only exception is if both environments share the same database (which they shouldn’t — a properly configured staging environment has its own separate database).
Will my staging site show up in Google?
It can if you don’t block it. Always set staging to noindex (Settings → Reading → Discourage search engines) and consider adding HTTP authentication. If Google indexes your staging site, it may create duplicate content issues for your live site.
Can I use staging for WooCommerce?
Yes, and you absolutely should for any WooCommerce changes. Test new payment gateways, shipping rules, and checkout modifications on staging first. Be careful when pushing a staging database back to live — any real orders placed on live after the staging copy was made will be overwritten. For WooCommerce, it’s usually better to push files only (plugin/theme changes) and handle database changes manually.
Is staging included in my hosting plan?
It depends on your host. Managed WordPress hosts like Cloudways, Pressable, and HostArmada include staging on all plans. Shared hosting providers typically don’t include it — you’d need to set it up manually or use a plugin.
Final Thoughts
A staging environment is one of those things that seems unnecessary — until the day a plugin update breaks your live site with 500 visitors on it. If your current host includes staging, set it up today even if you don’t have an immediate use for it. The five minutes it takes to create a staging clone is nothing compared to the hours it takes to recover from an avoidable production incident. And if your host doesn’t include staging, that’s a good reason to consider switching to one that does.
🚀 Get One-Click Staging on Every Plan
Cloudways includes full staging environments on all plans — create, test, and push to live in minutes, with no extra cost or configuration.
Try Cloudways Free →If you sign up through our link, we may earn a commission at no extra cost to you. Read our full affiliate disclosure.