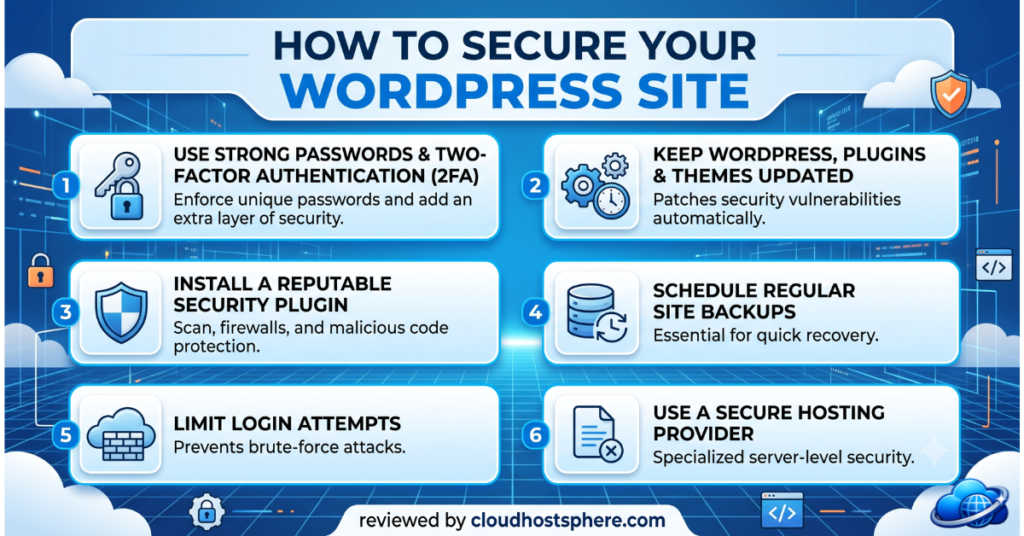
If you run a WordPress site, security isn’t optional — it’s the difference between a site that keeps running and one that gets hacked, blacklisted, and wiped. In our experience working with hundreds of WordPress installations, we’ve found that most successful attacks exploit the same handful of preventable gaps: weak passwords, outdated plugins, no backups, and unprotected login pages. This guide fixes all of them.
We’ve compiled every meaningful security measure into one actionable checklist. Whether you’re running a personal blog or a WooCommerce store, these steps apply — and most take under 10 minutes each to implement.
Why WordPress Sites Get Hacked
WordPress powers over 43% of the web, which makes it the most targeted CMS on the planet. But the majority of breaches aren’t sophisticated zero-day exploits — they’re opportunistic attacks hitting sites that skipped basic hygiene. The top causes we see repeatedly:
- Outdated plugins and themes — responsible for the majority of successful WordPress hacks
- Weak or reused passwords — brute force attacks hit wp-login.php thousands of times per day
- No backups — not a cause of hacking but the reason hacks become disasters
- Nulled (pirated) plugins — often contain pre-installed backdoors
- Wrong file permissions — misconfigured servers that allow file writes where they shouldn’t
Step 1 — Keep Everything Updated
The single highest-impact security action you can take is keeping WordPress core, plugins, and themes updated. The majority of exploited vulnerabilities have a publicly available patch — attackers simply scan for sites running the vulnerable version.
- Enable auto-updates for minor WordPress core releases (Go to Dashboard → Updates → Enable automatic updates)
- Review and update plugins weekly — set a calendar reminder if needed
- Remove plugins and themes you’re not actively using — inactive doesn’t mean safe
- Never run nulled (pirated) plugins or themes — they frequently contain backdoors
⚠️ Note: Before running major plugin updates, always test on a staging environment first. A plugin update that breaks your live site is nearly as disruptive as a hack.
Step 2 — Harden Your Login Page
WordPress’s default login URL (/wp-login.php) is a magnet for brute force attacks. Bots continuously attempt username and password combinations at scale. Here’s how to lock it down:
Use Strong, Unique Passwords
Every WordPress user account — especially admin accounts — should use a unique password of at least 16 characters. Use WordPress’s built-in password generator (Users → Edit → Generate Password) or a password manager like Bitwarden or 1Password. Never reuse passwords across accounts.
Enable Two-Factor Authentication (2FA)
2FA makes brute force attacks practically impossible — even if an attacker gets your password, they can’t log in without the second factor. Free plugins for 2FA include Wordfence Login Security and WP 2FA. Jetpack also includes brute force protection and 2FA across its plans.
Limit Login Attempts
By default, WordPress allows unlimited login attempts. Install a plugin like Limit Login Attempts Reloaded or use a security suite that includes this feature. After 3–5 failed attempts, the IP should be temporarily blocked.
Change the Default Admin Username
If your admin username is “admin”, change it immediately — it’s the first username attackers try. Create a new admin account with a unique username, log in with the new account, then delete the old “admin” user (reassigning its content to the new account).
Step 3 — Install a WordPress Security Plugin
A dedicated security plugin adds a layer of automated protection that handles threats you’d never manually catch. The top options:
Wordfence Security (Free + Premium)
Wordfence includes a Web Application Firewall (WAF), malware scanner, and real-time threat intelligence feed. The free version covers most small sites adequately. The premium version adds real-time firewall rule updates (free gets them 30 days delayed).
Jetpack Security
Jetpack Security (from Automattic, the company behind WordPress) combines real-time backups, malware scanning, brute force protection, and a downtime monitor in one subscription. It’s particularly strong on the backup side — every change is saved in real time, not just nightly.
Sucuri Security
Sucuri is particularly strong on malware cleanup — their paid plans include a manual hack removal guarantee. For high-traffic sites or WooCommerce stores handling transactions, Sucuri’s DNS-level WAF is worth the additional cost.
Step 4 — Set Up Backups (And Test Them)
Backups don’t prevent hacks — but they turn a potential catastrophe into a recoverable incident. A site with a recent backup can be cleaned and restored in under an hour. A site without backups may be lost entirely.
Backup frequency guidelines
- Daily changing content (news site, active blog): daily backups minimum
- WooCommerce store (transactions happening): real-time backups (Jetpack Security or your host’s backup system)
- Static or rarely updated site: weekly backups are sufficient
Store backups off-site — not just on your web server. If the server is compromised, backups stored on the same server are also at risk. Solutions: Jetpack Backup (stores off-site automatically), UpdraftPlus (backs up to Google Drive, Dropbox, or Amazon S3), or your managed host’s backup system.
⚠️ Important: Having backups isn’t enough — you need to test them. Restore a backup to a staging environment at least once every few months to confirm the backup is valid and the restore process works.
Step 5 — Use SSL / HTTPS
Every WordPress site should run on HTTPS. SSL encrypts data in transit between your server and visitors’ browsers — critical for login pages, contact forms, and any site handling payment data. Beyond security, Google uses HTTPS as a ranking signal.
Most hosting providers include free SSL via Let’s Encrypt. If yours doesn’t, switch hosts. Once SSL is active, update your WordPress URL in Settings → General to use https:// and set up a redirect from HTTP to HTTPS in your .htaccess file or via a plugin like Really Simple SSL.
Step 6 — Harden File Permissions and wp-config.php
WordPress file permissions control who can read and write to your site’s files. Incorrect permissions — particularly world-writable files — allow malicious code to be injected. Recommended permissions:
- wp-config.php: 400 or 440 (no write access, owner-read only)
- Directories: 755
- Files: 644
- .htaccess: 444 (read only)
You can check and update permissions via SFTP (FileZilla shows and allows permission changes) or via your hosting control panel’s file manager.
Step 7 — Move to a Managed WordPress Host
Many of the steps above are handled automatically by a quality managed WordPress host — server-level firewalling, malware scanning, automatic WordPress updates, and off-site backups are standard inclusions. If you’re spending significant time managing security manually, the time cost of self-management often exceeds the cost difference of a managed host.
Cloudways, for example, includes server-level firewalling, free SSL, automated backups, and DDoS protection across all its managed cloud plans.
Step 8 — Disable XML-RPC (If You Don’t Need It)
XML-RPC is a WordPress feature that allows remote connections to your site. It’s a common brute force attack vector because it allows multiple login attempts per request, bypassing standard rate limiting. Unless you actively use it (for the Jetpack app, certain mobile apps, or remote publishing workflows), disable it.
Add this to your .htaccess file to block XML-RPC entirely:
# Block WordPress xmlrpc.php requests
<Files xmlrpc.php>
order deny,allow
deny from all
</Files>
Step 9 — Monitor Your Site
Security is ongoing, not a one-time setup. Regular monitoring catches issues before they become full breaches:
- Uptime monitoring: Services like Jetpack, UptimeRobot, or your managed host alert you the moment your site goes down — which can signal a hack or server issue
- Google Search Console: Google flags security issues (malware, hacking) directly in GSC — check the Security Issues report monthly
- File change monitoring: Security plugins like Wordfence alert you when core files are modified unexpectedly
- Login notifications: Configure email alerts for new admin logins
WordPress Security Checklist — Quick Reference
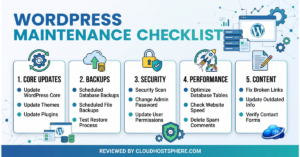
- ☐ WordPress core, plugins, and themes updated
- ☐ Unused plugins and themes deleted
- ☐ Strong, unique passwords on all accounts
- ☐ Two-factor authentication enabled for admin users
- ☐ Login attempts limited (plugin or host-level)
- ☐ Default “admin” username changed
- ☐ Security plugin installed and configured (Wordfence or Jetpack Security)
- ☐ Backups running automatically and stored off-site
- ☐ Backup restore tested at least once
- ☐ SSL / HTTPS active site-wide
- ☐ File permissions set correctly (wp-config.php = 400)
- ☐ XML-RPC disabled (if not in use)
- ☐ Uptime monitoring active
- ☐ Google Search Console Security Issues checked
Common Mistakes to Avoid
- ❌ Installing too many security plugins — they conflict with each other and cause performance issues. Pick one comprehensive suite.
- ❌ Setting and forgetting — security requires periodic review. Plugins need updating, backups need testing.
- ❌ Relying solely on your host — even managed hosts don’t protect against application-level vulnerabilities in your plugins and themes.
- ❌ Ignoring user accounts — old contributor or editor accounts with weak passwords are common entry points. Audit and remove unused accounts.
Frequently Asked Questions
How do I know if my WordPress site has been hacked?
Common signs include: unexpected redirects to other sites, Google search results showing spam content under your domain, your host suspending your account for malware, or Google Search Console flagging a security issue. Run a malware scan immediately using Wordfence or your security plugin if you suspect a breach.
Is a free security plugin enough?
For most small to medium sites, yes — the free tiers of Wordfence and Jetpack provide solid baseline protection. Paid plans add real-time rule updates, manual hack cleanup, and more frequent malware scanning. For WooCommerce stores handling payments, a paid plan is worth the investment.
How often should I back up my WordPress site?
Daily for any actively updated site. For WooCommerce stores or membership sites where data changes continuously, real-time backups (every transaction, every comment, every post) are essential. Jetpack Security provides real-time backup as part of its plans.
Does managed hosting replace a security plugin?
Partially — managed hosts handle server-level security (firewalls, DDoS mitigation, automatic updates, malware scanning at the server level). But they don’t protect against application-level vulnerabilities introduced by your plugins and themes. A security plugin at the WordPress level complements managed hosting — it doesn’t duplicate it.
Final Thoughts
WordPress security doesn’t require advanced technical skills — it requires consistency. Run through the checklist above, set up automated backups and monitoring, keep everything updated, and you’ll have a significantly more secure site than the vast majority of WordPress installations on the web. For site owners who want security handled proactively at the infrastructure level, a managed WordPress host with built-in security features is worth serious consideration.
🔒 Want Security Handled For You?
Cloudways managed hosting includes server-level firewalls, automated backups, free SSL, and DDoS protection on every plan — so you can focus on your site, not your security stack.
Get Started with Cloudways →If you sign up through our link, we may earn a commission at no extra cost to you. Read our full affiliate disclosure.